Add a Class
How to Add a Class in SIS
Follow the steps below to add a class in SIS.
- Log in to SIS with your UWGB username and password.
- Complete the multi‑factor authentication prompt. Confirm using your chosen method.
- After authentication, you’ll land on the Student Homepage.
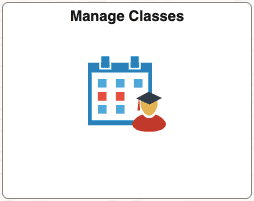
- Open the Manage Classes tile on your Student Homepage.
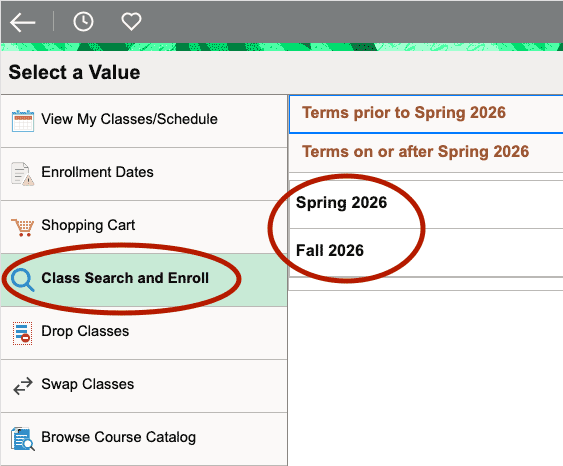
- Select Class Search and Enroll, then click the appropriate semester.
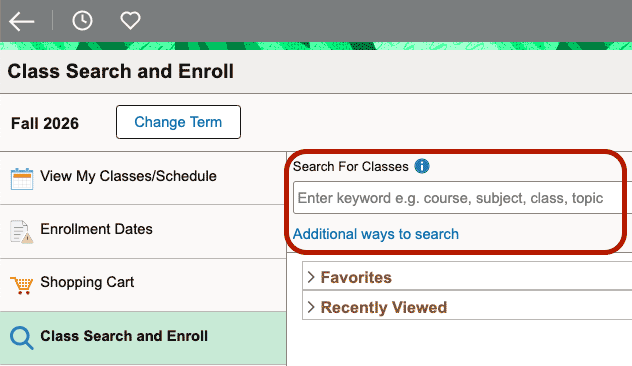
- Under Search for Classes enter a specific course title (e.g., ART 102) or click Additional ways to search to search by Available Subjects, Catalog Number, or Instructor Last Name. Additional filter options will be available once you hit Search. Once you find the class you want, select a section.
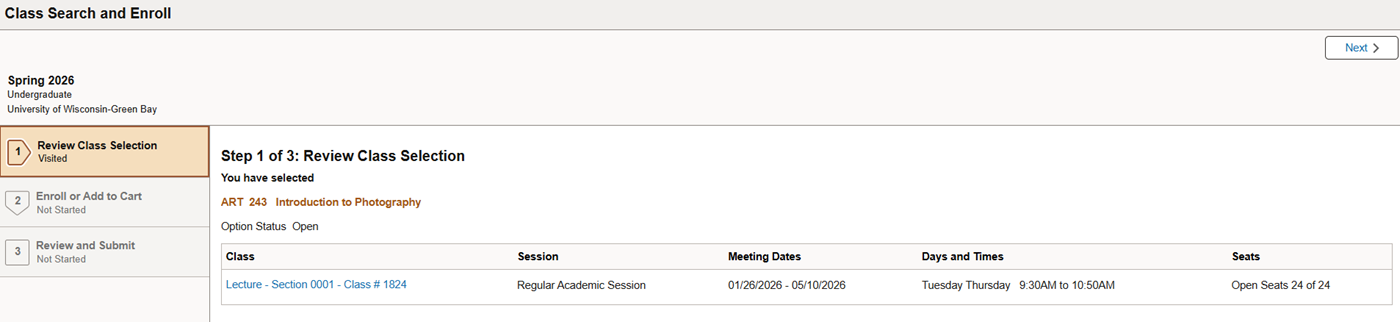
- Step 1 of 3: Review Class Selection. You’ll see details about the class including: section number, schedule, seats open. Confirm it’s the correct section. When you're ready click Next.
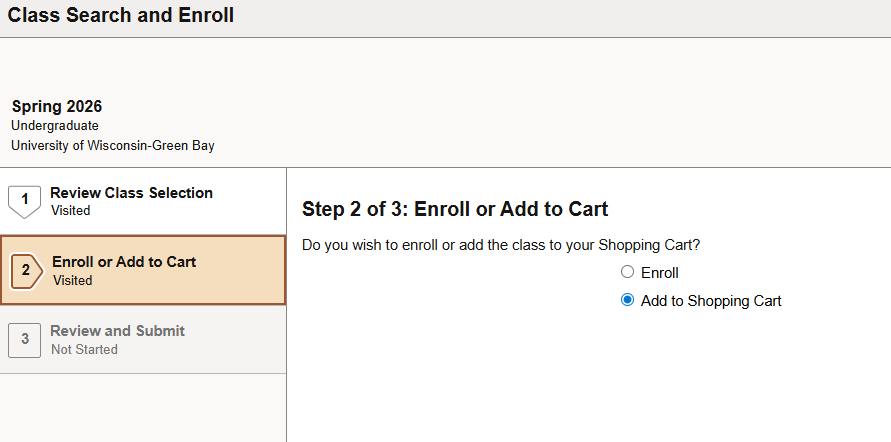
- Step 2 of 3: Enroll or Add to Shopping Cart. Your answer here depends on your enrollment date.
- If enrollment is open, choose Enroll.
- If your enrollment period hasn’t started, choose Add to Shopping Cart. Your shopping cart stores classes until your term enrollment window begins.
- When you're ready, click Next.
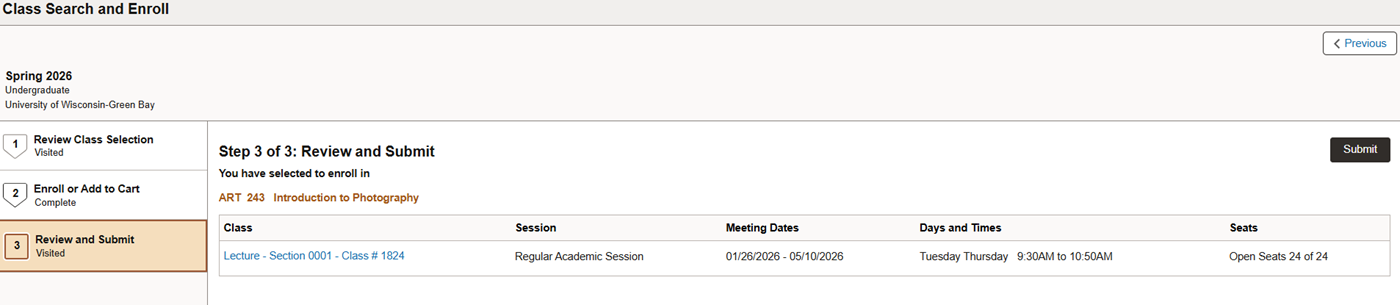
- Step 3 of 3: Review and Submityour selection. You aren’t enrolled until you reach the final confirmation screen.
- Review your selected class(es)
- Click Submit.
- Watch for the success message showing you’ve added the class.

Here to help!
We're here to answer your questions. Our knowledgeable support staff are ready to provide personal assistance with all your advising needs.