Student Information System
Help
These Help pages provide information for using the Student Information System (SIS). For role-specific help, click one of the green Student or Faculty/Staff buttons below, or find out how to log in below.

Logging in to SIS
To log in to UW-Green Bay's Student Information System (SIS), you will need an active UW-Green Bay account and a secondary device (such as a smartphone) with the Okta Verify app installed to complete Okta multi-factor authentication. If you need assistance with account access or Okta verification, please refer to the GBIT Self-Service Portal, where set-up instructions and answers to frequently-asked questions can be found.
- Navigate to SIS.
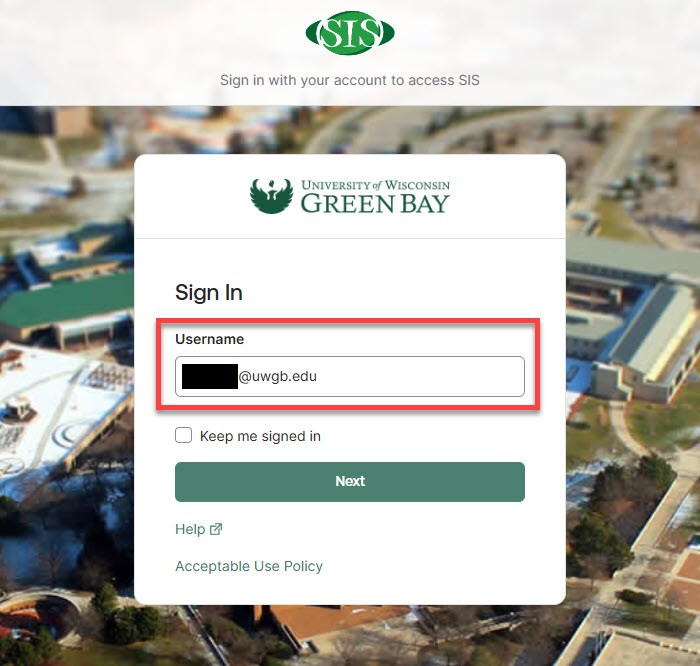
- Enter your UW-Green Bay username (including the "@uwgb.edu") and click the green Next button.
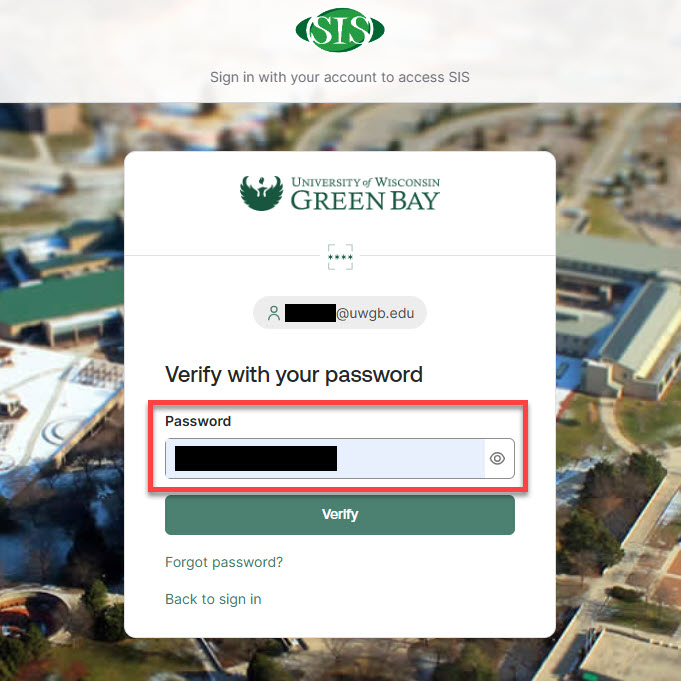
- Enter your UWGB account password and click the green Verify button.
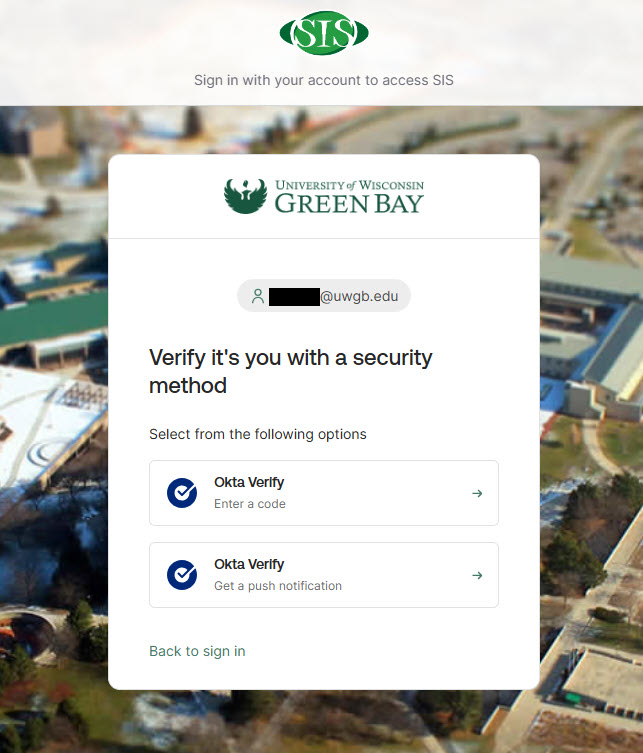
- Verify your login attempt using the Okta Verify app on your secondary device. You may be prompted to choose a verification method (“Enter a code” or “Get a push notification,” described below), or a method you previously used may activate automatically. If prompted to choose, select the option most convenient for you.
- Enter a code
Open the Okta Verify app on your secondary device and in the section labelled myapps.uwgb.edu, click the eye icon next to the 6 shaded boxes. A 6-digit login code will be generated for you. Enter this code into the SIS page to confirm your identity.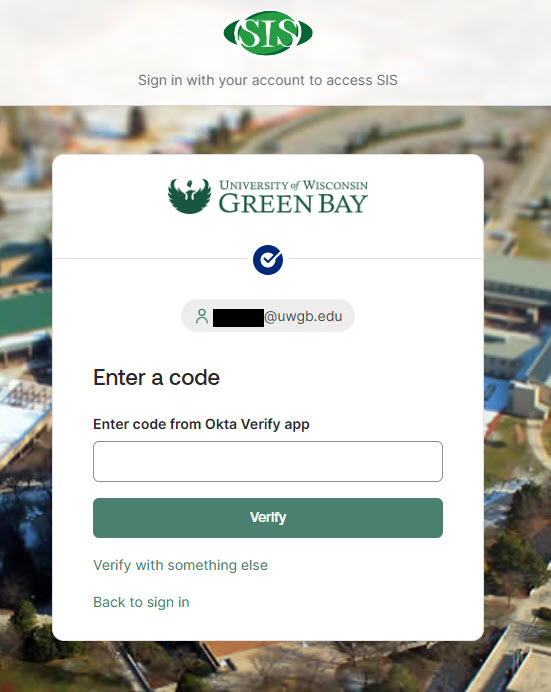
- Get a push notification
If you choose to receive a push notification, a prompt will appear on your secondary device. Open the notification to approve your SIS login in the Okta Verify app.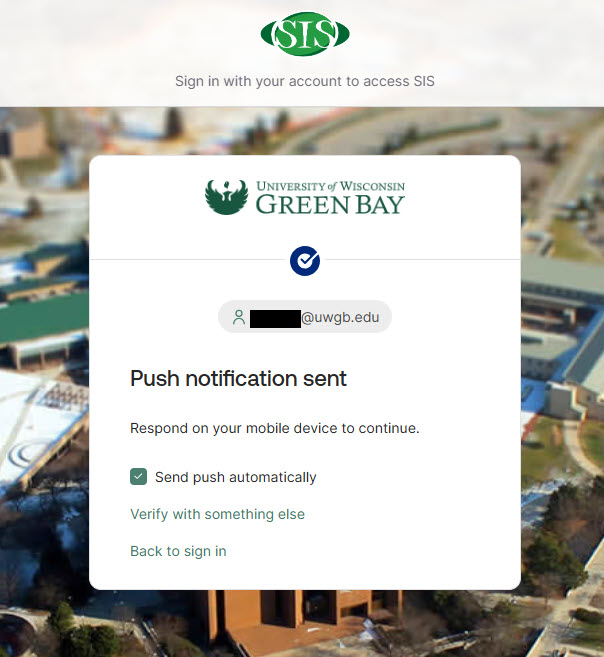
- Enter a code
- After successful authentication through Okta Verify, you should now be logged in to SIS.
If you are unable to log in after following these steps, contact the GBIT Service Desk for assistance.
More questions?
Reach out to the Student Services Center by phone at (920) 465-2111 or by email at ssc@uwgb.edu. The Student Services Center answers general usage and "how to" questions including how to enter grades, request an official transcript, or add or drop a class. If you are not sure who to contact for help, call the Student Services Center and we will refer your question to the appropriate person, if necessary.