Grades
New for Summer 2026
Beginning Summer 2026, instructors will be asked to provide a Last Date of Academically Related Activity (LDA) when entering grades of WF, NC, I, or PR on the grading roster. This information helps the university meet federal financial aid requirements for Title IV compliance purposes and determine whether a student stopped participating in a course during the semester.
Contact the Office of Financial Aid if you have questions related to determining the last date of academically related activity (LDA) or what qualifies as academically related activity. Email financialaid@uwgb.edu or call 920-465-2075 for assistance.
Overview
Grade Rosters are generated in the Student Information System during the last week of a course's given session.
- Grades are due seven (7) calendar days after the last day of final exams or the last day of classes, whichever is later.
- Each session's specific grading deadline can be found on the Registration Calendar page for the corresponding term.
Failure to add grades in a timely manner delays processing of academic standing, conducting satisfactory academic progress assessment, degree conferral, issuing diplomas and/or transcript documents, reporting of accurate enrollment and degree data to various entities for compliance and can prevent students from registering for subsequent courses.
- Once grades have been entered and the roster has been approved by the instructor, grades are posted twice daily (AM/PM) and become visible to students at that time.
- To send final grades from the Canvas gradebook to SIS, please refer to the Sending Final Grades to SIS page on the UWGB Knowledge Base.
Grades & Grading Bases
Deadlines
Instructors must enter grades no later than seven (7) calendar days after the final examination or last date of that individual course. The specific deadline for each session's grades can be found on the Registration Calendar page for the corresponding term.
If an instructor has not assigned a grade for a student prior to the grading deadline, a temporary "missing" grade of N is applied. Changing an N grade can be done using the method described in the "Changing Posted Grades" section below.
Failure to add grades in a timely manner delays processing of academic standing, conducting satisfactory academic progress assessment, degree conferral, issuing diplomas and/or transcript documents, reporting of accurate enrollment and degree data to various entities for compliance and can prevent students from registering for subsequent courses.
Grades Available
A student's grading basis determines the grades they can be assigned. Not all students may be registered under the same grading basis. Available grade options may also differ for undergraduate and graduate students. Listed below are the most common grades, their definitions, and the grades' designated points per credit. Additional information about temporary grades (N and I grades) can be found underneath.
| Letter Grade | Definition | Grade Points per Credit |
|---|---|---|
| A | Excellent | 4.0 |
| AB | Very Good | 3.5 |
| B | Good | 3.0 |
| BC | Above Average | 2.5 |
| C | Average | 2.0 |
| CD | Below Average | 1.5 |
| D | Poor | 1.0 |
| F | Unacceptable | 0.0 |
| WF** | Unofficial Withdrawal | 0.0 |
| N | No acceptable report from instructor, temporary grade assigned by Registrar's Office | No effect until a grade is submitted |
| P | Pass, letter grade of "C" or better | No effect |
| NC** | No credit, letter grade of less than "C" | No effect |
| S | Satisfactory Audit | No effect |
| U | Unsatisfactory Audit | No effect |
| I** | Incomplete, temporary grade | No effect until a grade is submitted |
| PR** | Progress in graduate thesis or internship, not complete | No effect |
**New for Summer 2026**
Beginning Summer 2026, instructors will be asked to provide a Last Date of Academically Related Activity (LDA) when entering grades of WF, NC, I, or PR on the grading roster.
This information helps the university meet federal financial aid requirements for Title IV compliance purposes and determine whether a student stopped participating in a course during the semester.
Contact the Office of Financial Aid if you have questions related to determining the last date of academically related activity (LDA) or what qualifies as academically related activity. Email financialaid@uwgb.edu or call 920-465-2075 for assistance.
Notice on Temporary Grades:
If an instructor has not assigned a grade for a student prior to the grading deadline, a temporary "missing" grade of N is applied. Changing an N grade can be done using the method described in the collapsible "Changing Posted Grades" section below.
At the instructor's discretion, an incomplete (or "I") grade can be assigned to a student enrolled in the GRD or P/NP grading basis. An I grade indicates that the student has been granted an extension to submit missing coursework.
I grades will lapse to an F (GRD basis) or NP (P/NP basis) at the end of the following regular semester:
- Spring & Summer incompletes are due at the end of the following Fall semester
- Fall and Interim incompletes are due at the end of the following Spring semester
Prior to lapsing, changing an I grade can be done for a previous term using the method described in the collapsible "Changing Posted Grades" section. After an I grade has lapsed, instructors must obtain approval of an extension from the appropriate college dean and provide this information to the Registrar's Office.
Additional Information:
- Undergraduate:
- Graduate:
Please contact the Registrar's Office with any other grading or roster questions.
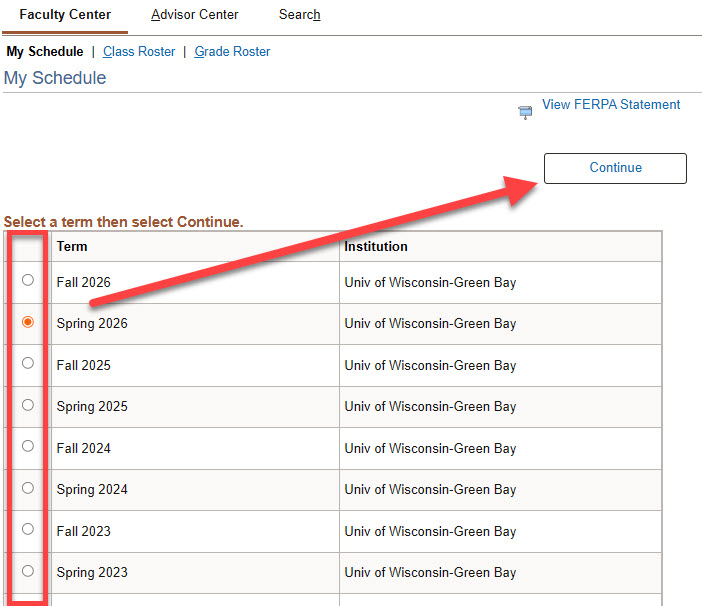
Navigate to a Different Term
- On the main "My Schedule" page, select the Change Term button.

- Select the term you need and click Continue.
Entering & Submitting Grades
Log in to the Student Information System to access your Faculty Center.
Ensure the correct term is selected. If you need to change the term, please view the section above titled "Navigate to a Different Term."
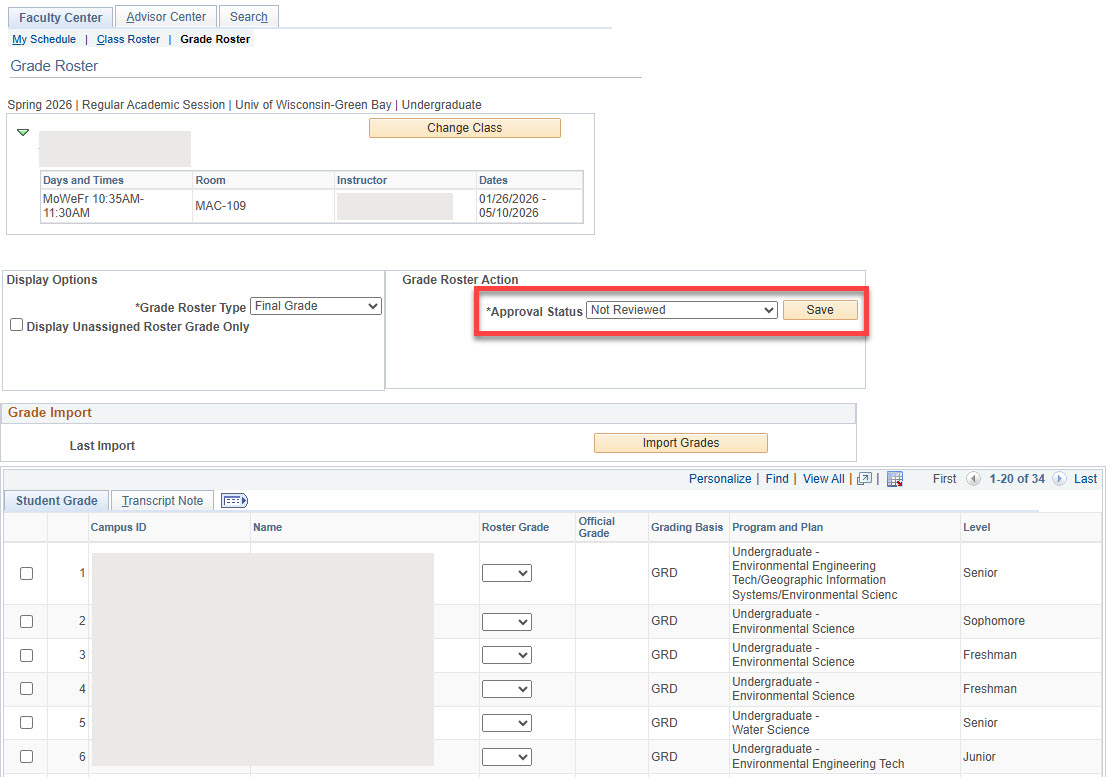
- Select the Grade Roster icon next to the course you will be grading.
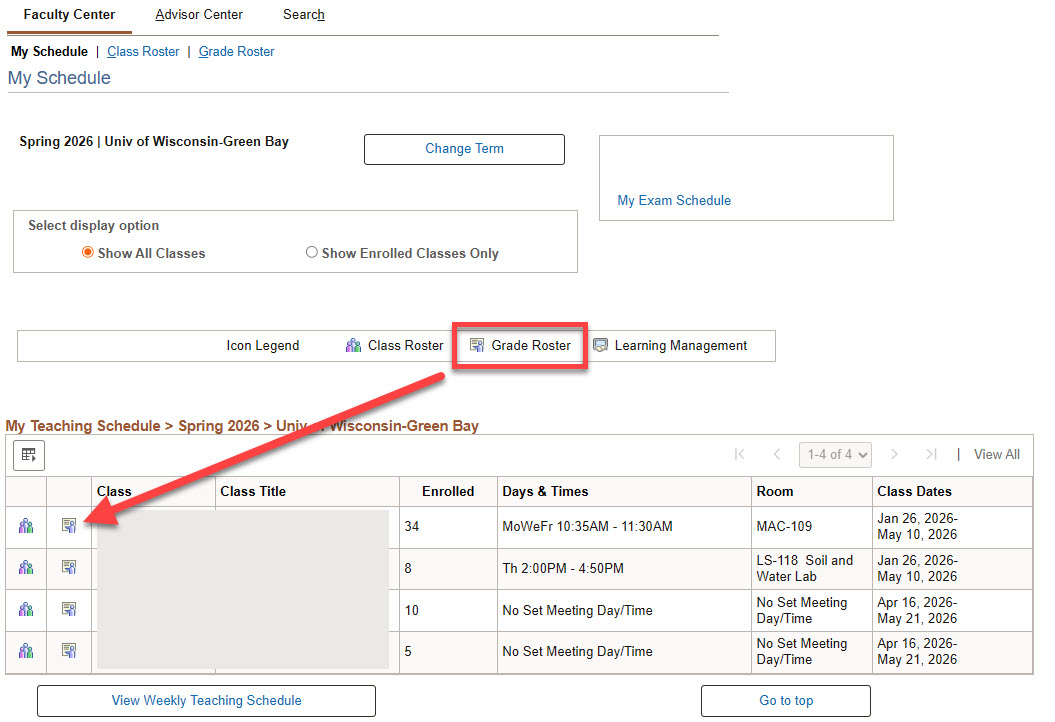
If there is no grade roster icon next to a course, a grade roster has not been created. If you believe this to be an error, please contact the Registrar's Office for assistance at registrar@uwgb.edu. - The roster lists students alphabetically by last name, using preferred name. Grades are entered for each student using the drop-down menu in the Roster Grade column. Clicking on the drop-down will open a list of the available grade choices for each corresponding student.
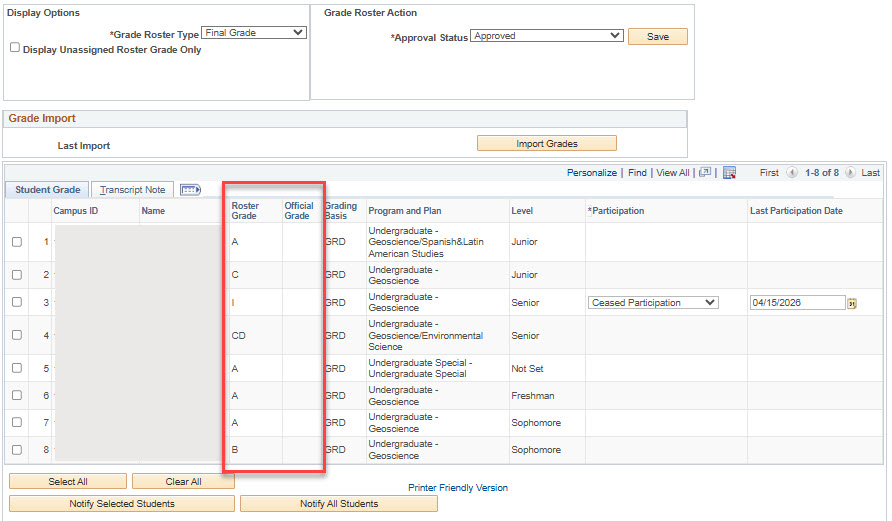
You may note that not all of your students are listed with the same "Grading Basis." This can impact the grades that can be assigned to them. For additional information regarding grades and grading bases, see the section above titled "Grades & Grading Bases.- Beginning Summer 2026, instructors will be asked to provide a Last Date of Academically Related Activity (LDA) when entering grades of WF, NC, I, or PR on the grading roster. After selecting one of these grades, a column will appear to the right in which you may indicate their level of participation in your course.
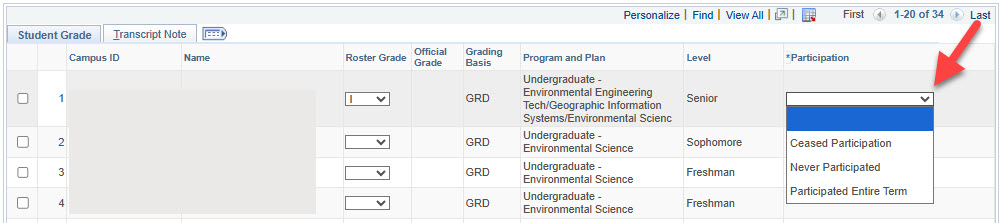
- If you select "Ceased Participation," a last date of participation will be requested
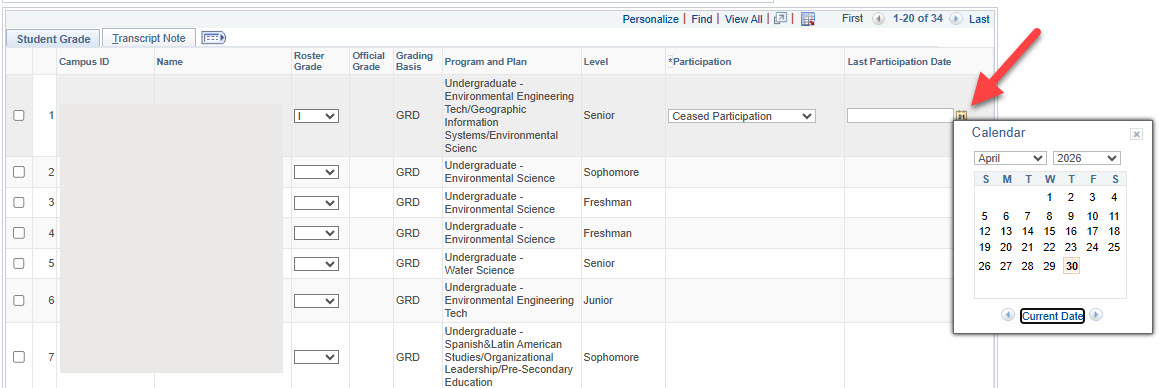
Contact the Office of Financial Aid if you have questions related to determining the last date of academically related activity (LDA) or what qualifies as academically related activity. Email financialaid@uwgb.edu or call 920-465-2075 for assistance.
- Beginning Summer 2026, instructors will be asked to provide a Last Date of Academically Related Activity (LDA) when entering grades of WF, NC, I, or PR on the grading roster. After selecting one of these grades, a column will appear to the right in which you may indicate their level of participation in your course.
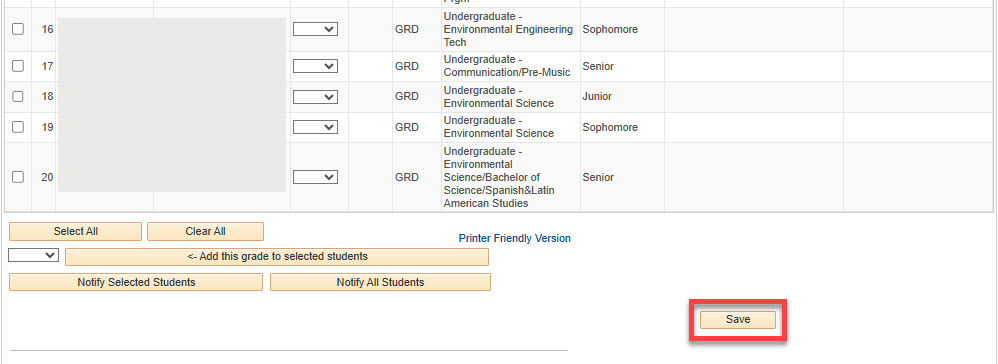
- Save frequently as you are entering grades. The Save button is located at the bottom of the page, under the roster. After you save, you may leave the page and return to continue your work -- all grades do not need to be entered at once. You will also need to save when you are finished entering grades.
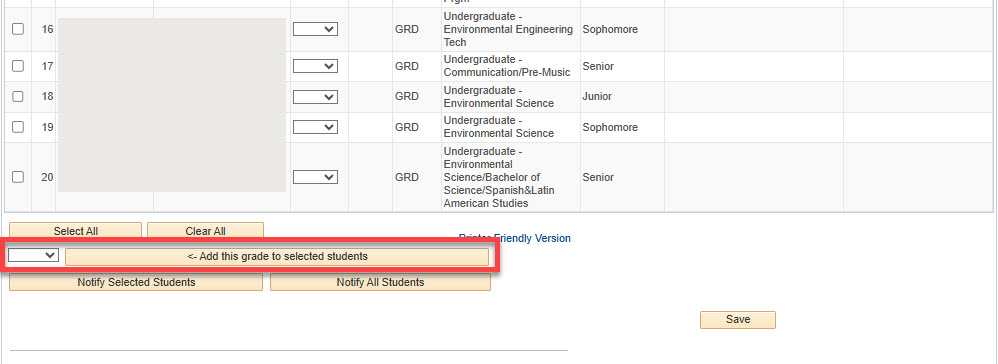
- You can assign the same grade to multiple students by clicking either Select All at the bottom of the roster or checking the boxes on the left side next to the students you'd like to assign the same grade. Then, use the drop-down menu underneath the roster to select the specific grade to assign. Click the <- Add this grade to selected students button next to it. If you utilize this option, you still retain the ability to edit any individuals' grades, this does not "lock" any information.
- If you have more than 20 students in your course, there are more than one page of students on your grade roster. Use the arrows shown below to navigate between pages to ensure each student is assigned a grade.

- Once you have finished, save your roster using the button at the bottom of the page. Then, scroll to the top of the page to the "Grade Roster Action" section. As shown below, use the drop-down arrow next to Approval Status, select Approved, and then click the Save button next to the drop down menu box. ALL students must have a valid grade entered before the status can be changed.
Choosing a status other than Approved (i.e. Ready for Review or Not Reviewed) will result in the grade posting process NOT updating the grade on the student record.
- After saving the Approved status, your screen should look similar to the one shown below. The Grade Input drop-downs have been replaced by the static grades you've entered and the Official Grade column is empty.
- Students will NOT be able to see their grades until the grade posting process has been run by the Registrar's Office. This process runs automatically twice a day, once in the morning and once in the afternoon. There are several indicators that will tell you if your grades have been posted: 1) the Approval Status becomes grayed out and "Posted" appears next to it; 2) the Official Grade column will be populated; 3) "Posted" will appear next to each student's row.
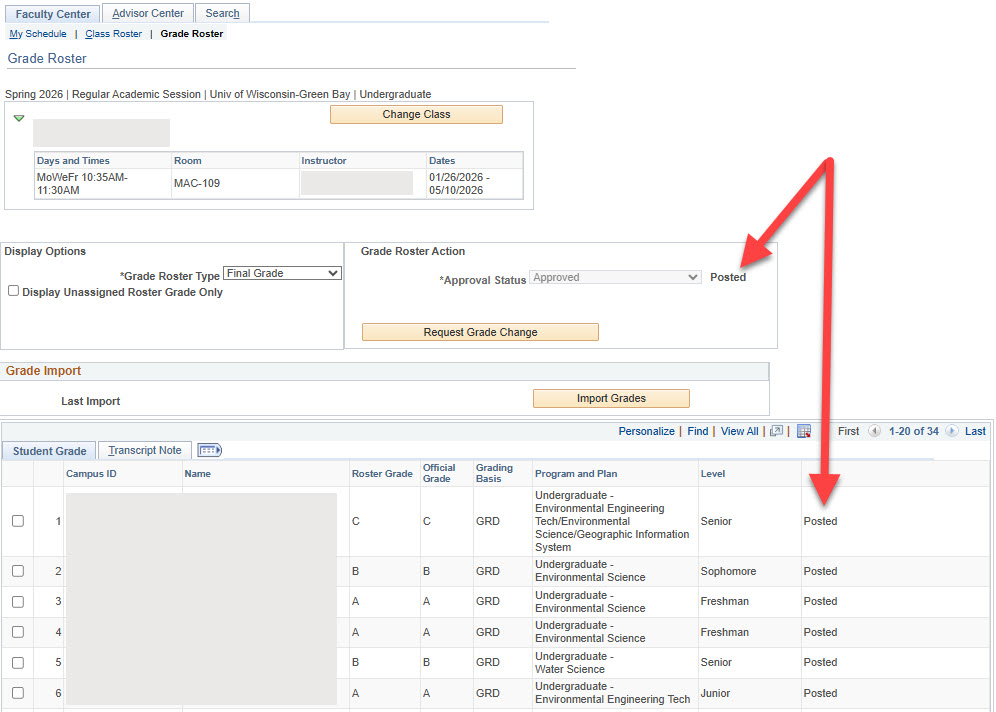
If these indicators are present, the grades have been posted and can be seen by your students.
Changing Posted Grades or Grades from a Previous Term
Updating a grade from a previous term can be done until the end of the following regular semester (Spring/Summer grades until the end of the following Fall semester, Fall/Interim grades until the end of the following Spring semester). To change a grade from an earlier term, please contact the Registrar's Office for assistance.
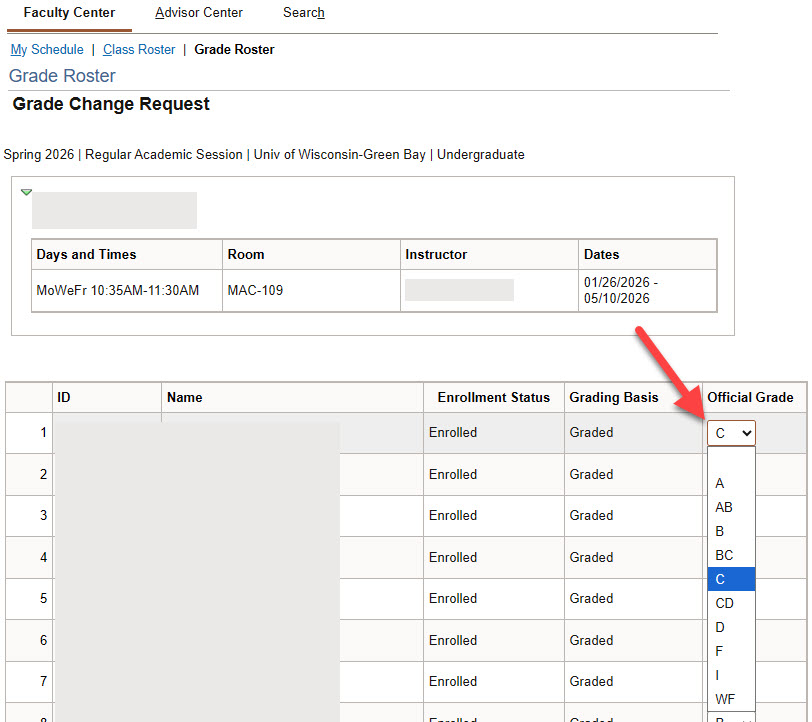
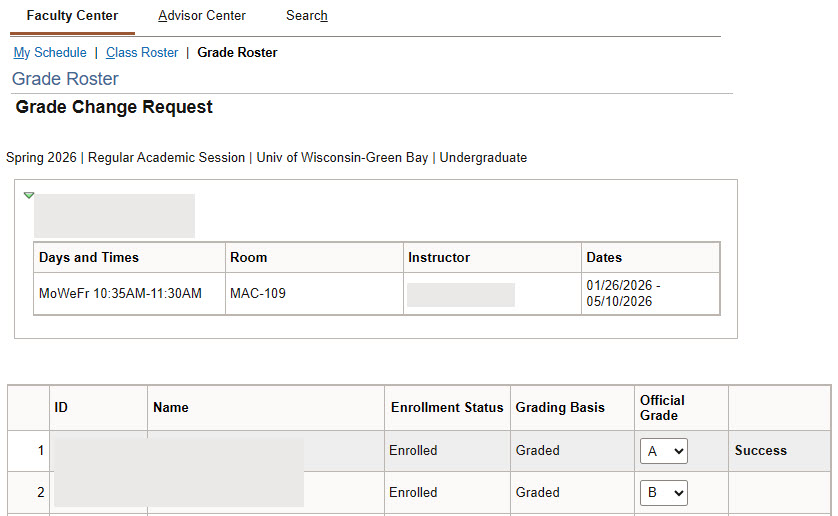
- Locate the corresponding term and grade roster. Select Request Grade Change in the Grade Roster Action section:

- Using the drop-down menus in the "Official Grade" column, select the new grade and click Submit at the bottom of the page.
- If the change has been processed, a "Success" notice will appear next to the student.
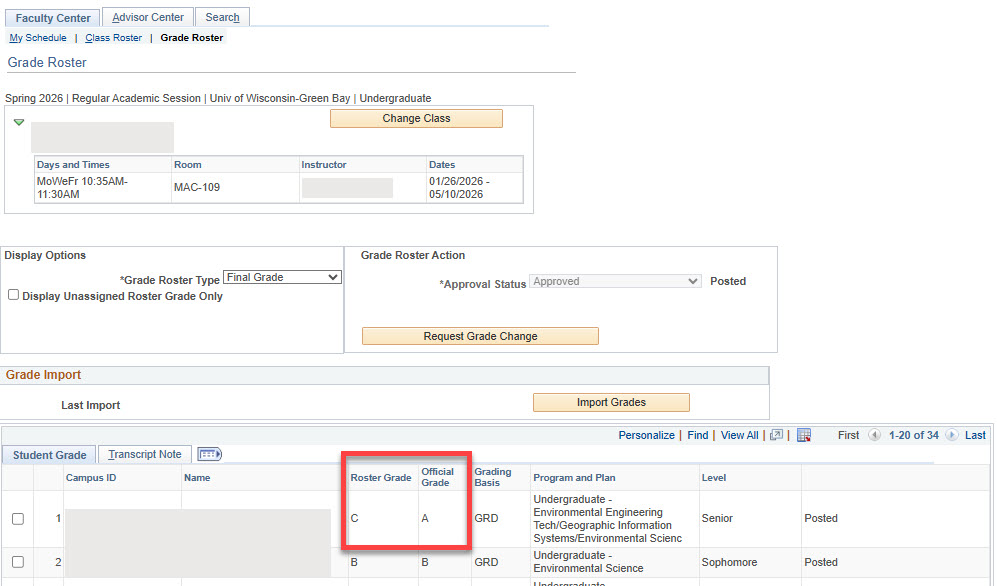
- Click the Return to Grade Roster button on the bottom of the page. On the grade roster, the old grade will appear in the Roster Grade column and the new, changed grade in the Official Grade column.
Additional Information:
- Undergraduate:
- Graduate:
Please contact the Registrar's Office with any other grading or roster questions