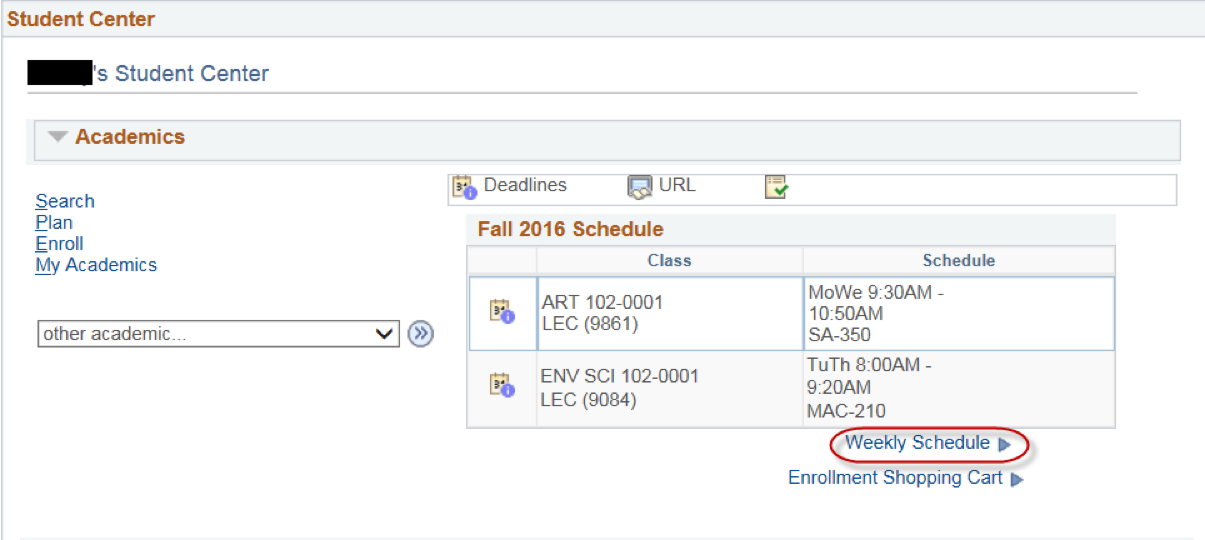
Print your class schedule
- Log on to the Student Information System.
- From the Student Center main menu, select "Weekly Schedule".
Choose your browser's File, Print command to send the schedule to the printer.
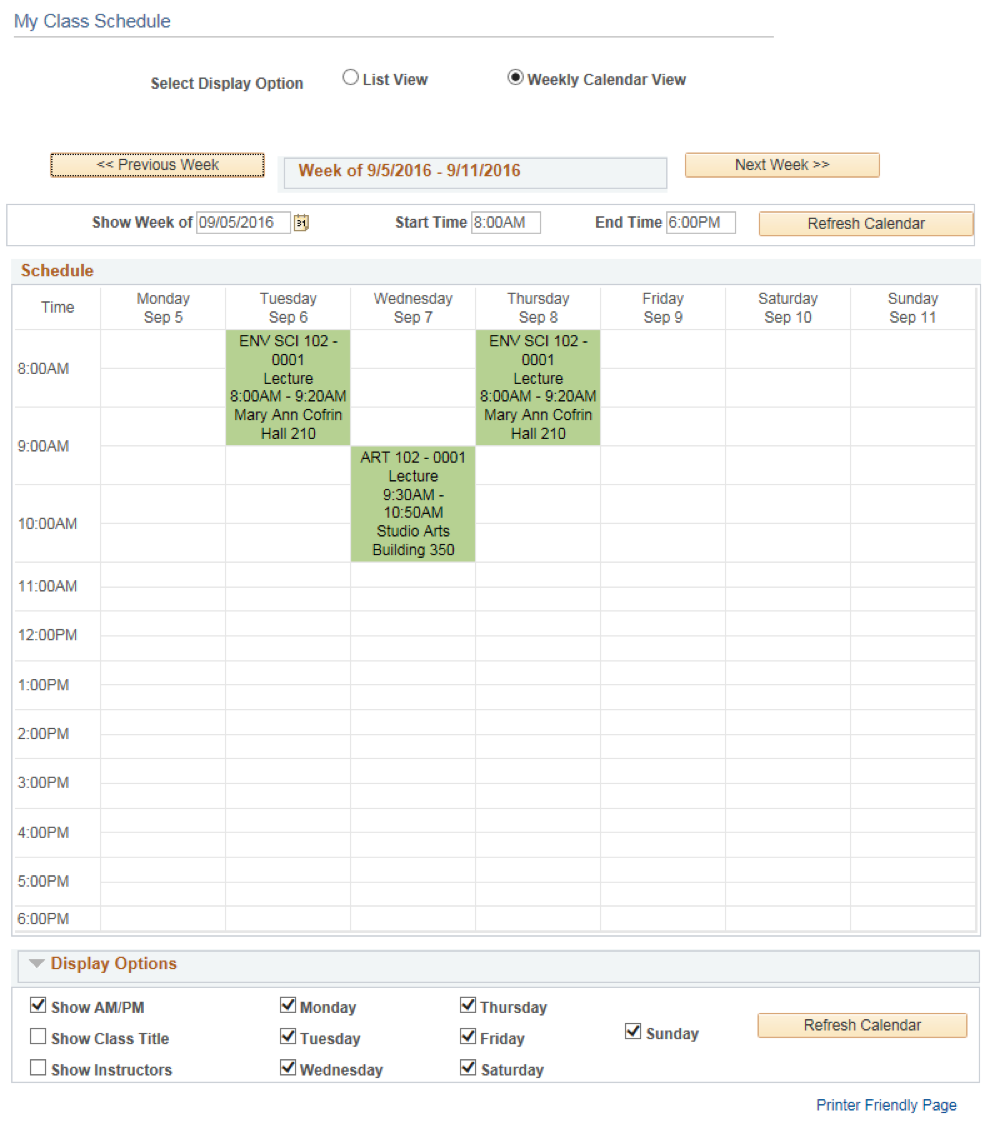
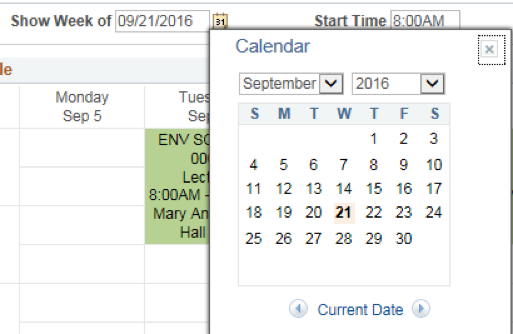
If you select View My Weekly Schedule, the first week of the current semester will default. The first week of the Fall semester often does not begin on a Monday. You may need to select either the or a different date within the term by clicking the small calendar icon to the right of the Show Week of field. For example, to display the Fall 2016 term, select a date early within that term, i.e. September 21. Remember to click on a particular day; you cannot just select the month.
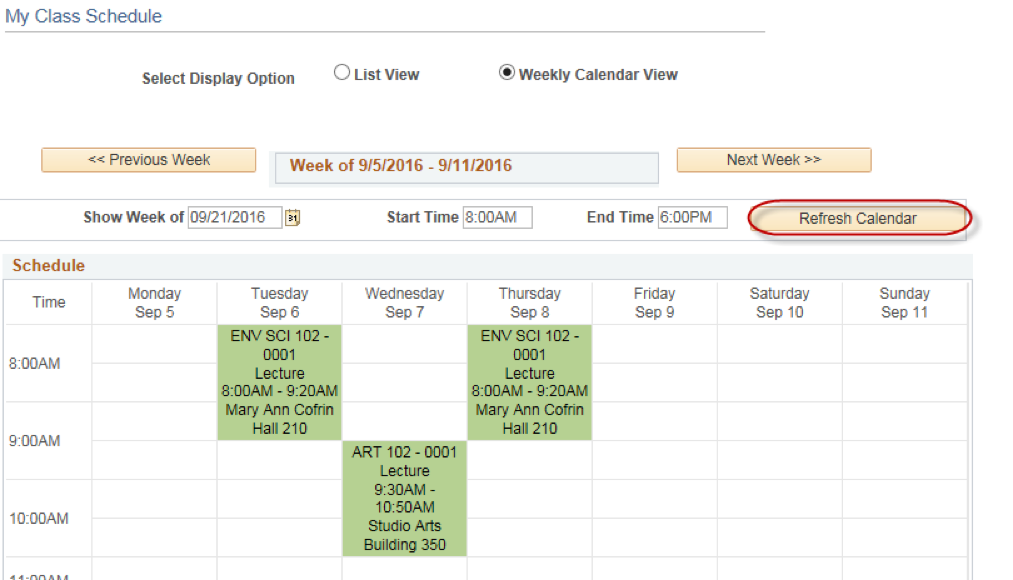
Click the Refresh Calendar button to update the screen.
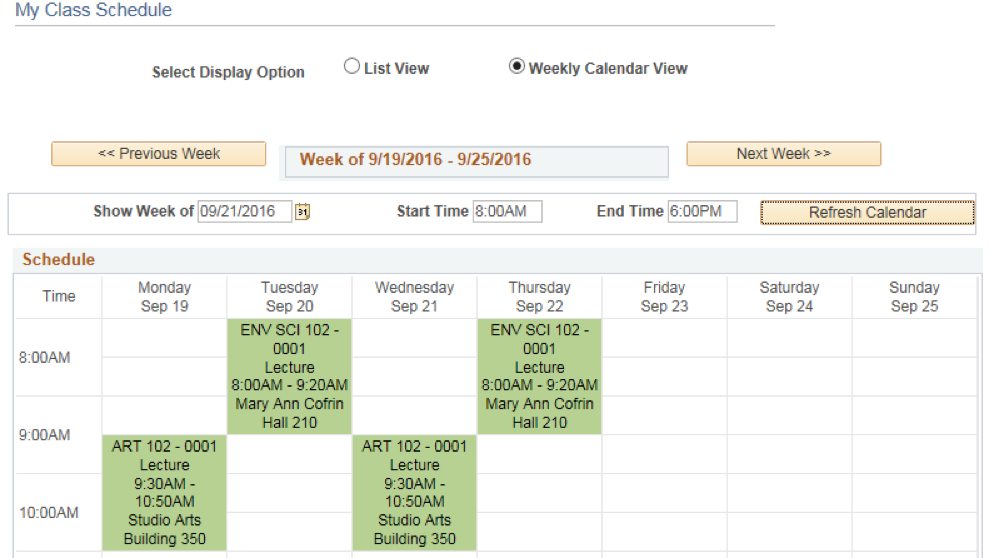
You may also adjust the Start and End time. For example, if your latest class ends at 10:50AM, change the End Time to 10:50AM.
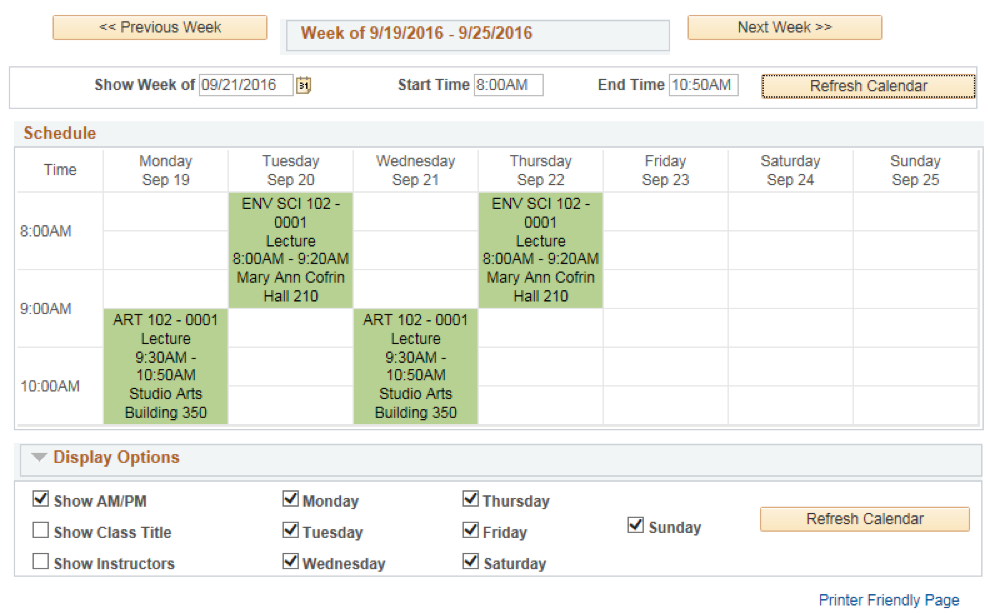
In addition, you can choose whether to show instructors' names, AM/PM, and specific days of the week within Display Options at the bottom of your schedule. For printing purposes, we recommend that you keep Saturday and Sunday on the display. (If you print the schedule in the normal portrait mode, part of the screen is cut off so that all of Sunday and part of Saturday will not print.) If you choose to print in a landscape orientation, check to see how many pages have been generated. You may only need to print the first page.

If additional modifications are made, click the Refresh button to refresh the display. Choose your browser's File, Print command to send the schedule to the printer.